
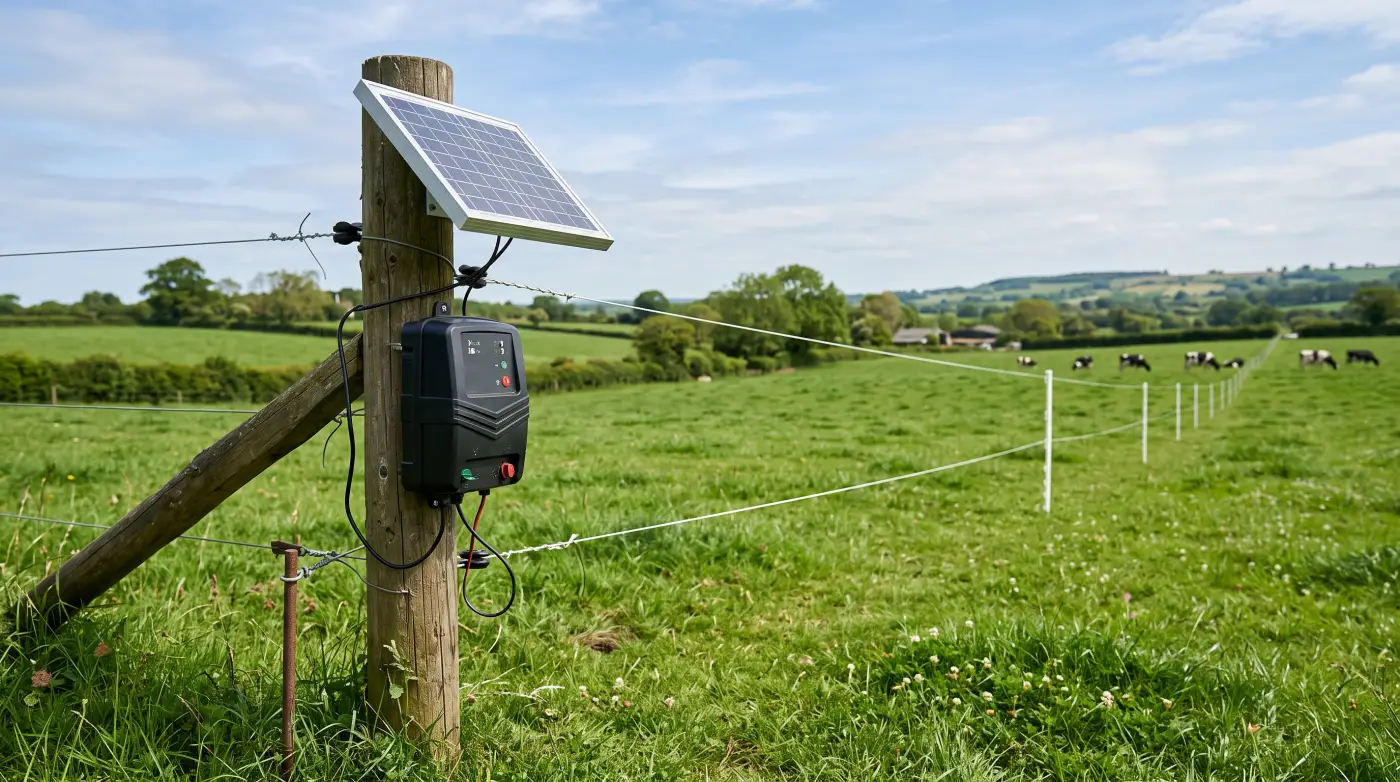
A solar electric fence is the most practical way to fence a paddock that is too far from the barn to run a cord, too temporary to warrant permanent posts, or too large for grid-tied infrastructure. Done right, a solar fence delivers a fence-line pulse in the four to eight kilovolt range, runs unattended for years, survives lightning country, and costs less than a week of hay. Done wrong, it sits in a field delivering 600 volts to nothing, the battery sulfated beyond saving, while the cows drift through a downed wire into the neighbor's alfalfa. The difference between those two outcomes is not brand or budget. It is sizing, grounding, and a handful of installation details that almost nobody gets right the first time. This guide walks through how solar fence systems actually work, how to size the energizer and solar supply for your conditions, how to build a ground system that performs in dry soil, how to lay out fence for different classes of stock, and how to diagnose a fence that is not hitting the way it should.
Before you buy anything, it helps to understand the physics. An electric fence is not a continuous current loop. It is a pulse generator that dumps a short, high-voltage burst of energy into a wire every one to one and a half seconds, then goes quiet. When an animal touches the wire and is also touching the ground, a small fraction of that pulse travels through the animal to the soil, back through the ground rods, and into the energizer's negative terminal. The animal feels a sharp shock and learns to respect the wire. Everything else about the system - battery, panel, wire, posts, insulators - exists to keep that pulse strong, reliable, and properly delivered.
The energizer is the heart of the fence. It draws low-voltage DC from a battery, steps it up through a capacitor-charged transformer, and releases a high-voltage pulse to the fence line. The important specifications are output joules, output voltage under load, and pulse duration. Joules are the energy delivered per pulse. Output voltage under load is what reaches an animal when vegetation is touching the wire. Pulse duration is how long the shock lasts, and shorter is generally safer and more effective on hair-covered animals.
A quality low-impedance energizer can push a pulse through wet grass, brush, and damp soil and still deliver enough voltage to teach a lesson. Cheap energizers collapse under load. You can test this with a fault tester: a good unit reads 5,000 volts with no load and drops only to 3,500 under moderate vegetation contact. A cheap unit reads 8,000 volts open-circuit and drops to 900 volts the moment a weed leans on the wire.
The solar side of a portable fence is simple on paper. A photovoltaic panel charges a deep cycle battery during the day, and the battery powers the energizer around the clock. The catches are sizing for the shortest day of the year at your latitude, choosing a panel mounting angle that does not get buried in snow, and selecting a battery chemistry that tolerates being run down hard on a cloudy week.
Most commercial all-in-one solar fence units pair a 10 to 25 watt panel with a sealed lead-acid or AGM battery in a weatherproof housing. These are fine for small paddocks of a mile or less. For larger systems, a separate panel, charge controller, battery bank, and energizer usually outperforms a factory bundle by a wide margin, and individual components can be replaced when they fail.
A fence wire carries the outgoing pulse. The return path goes through the soil and back into ground rods at the energizer. That is why wet soil makes a fence hit harder and dry soil makes it weak. In truly dry soil - sand, gravel, drought-cracked clay - the return path through the earth is too resistive, and the fence will not deliver a full shock even to an animal standing on it. In that case, a hot-ground system with alternating live and grounded wires solves the problem, because the animal completes the circuit between the wires rather than between wire and soil.
The number one specification to compare energizers is joules output, not voltage. Two energizers both labeled "8,000 volts" can deliver wildly different amounts of energy. The joule rating tells you how much punch reaches the wire.
Always oversize. A fence that runs at 20 percent of energizer capacity delivers the same shock through a weedy wet spring that a correctly sized fence does in clean conditions in midsummer. An undersized fence quits the first week the grass grows up to the wire.
Do not be fooled by advertised "miles of fence" numbers. Manufacturers test those claims on clean, properly insulated, dry wire, which is not real pasture. A safe rule is to buy an energizer rated for at least double the miles you actually have, and triple if you are running through brush country or using multi-wire fences where the total wire length is greater than the perimeter length. A four-wire fence around a 40 acre paddock is not one mile of wire. It is four miles of wire plus every brace, gate bypass, and cross-fence tap.
Cattle with hair coats and thick hides need 3,000 volts minimum at the wire to respect the fence. Horses with short coats and sensitive skin learn at 2,000 volts and may injure themselves on higher-output systems. Sheep and goats with dry wool are among the hardest animals to contain electrically because wool does not conduct. A sheep fence often needs 4,000 to 5,000 volts on-wire and may require multiple live wires close to the ground where the sheep's nose and legs will make contact. Pigs learn fast at moderate voltage but have dry skin and often do best with the first wire low enough to contact their snout.
A solar setup that runs out of battery by February is not a working system. The day to design around is the shortest, cloudiest day of the year, not the average spring day when the brochure photo was taken.
Start by listing the energizer's power draw in watts or amp-hours. A two-joule energizer typically draws about 3 to 5 watts continuously. A six-joule unit draws 8 to 12 watts. Multiply by 24 hours to get daily watt-hours. A six-joule fence drawing 10 watts uses 240 watt-hours a day.
Lead-acid deep cycle batteries should not be drawn below 50 percent regularly, so you need twice your useful capacity in nameplate amp-hours. For the 240 watt-hour example above, at 12 volts, that is 20 amp-hours of useful capacity, meaning at least a 40 amp-hour battery. Now factor in three to seven days of winter cloud cover depending on your climate. A five-day autonomy target means five times 40, or a 200 amp-hour battery bank.
AGM batteries tolerate deeper discharge and freeze cycles better than flooded lead-acid, and they can sit sideways or upside down in a portable rig. Lithium iron phosphate is the best choice if you can afford it - full depth of discharge, 10 year life, half the weight, and no sulfation - but the upfront cost is two to three times lead-acid.
A good rule of thumb for temperate latitudes is to install solar panel wattage equal to the daily watt-hour budget divided by 3 for summer and divided by 1.5 for deep winter. For the 240 watt-hour example, that means a 160 watt panel for winter-reliable operation north of 40 degrees latitude. In cloudy coastal or high-latitude regions, double that.
Mount the panel at a steep angle, near your latitude plus 15 degrees for winter performance, facing true south in the northern hemisphere. A panel that sits flat in the summer and slopes toward the sun in winter is the ideal. Snow slides off a steep panel; it buries a flat one. Fence panels mounted vertically on a pole for easy snow shedding produce less total energy in summer but avoid the winter shutdown problem entirely.
Always use a charge controller between the panel and battery. PWM controllers are cheap and adequate for panels under 100 watts. MPPT controllers are worth the extra cost above 100 watts and in cold climates where they can harvest an extra 10 to 25 percent from a cold panel on a sunny winter day. Set the charge controller for the correct battery chemistry. A lithium battery on a flooded lead-acid profile will be undercharged and will die in a year.
More electric fences underperform from bad grounding than from any other cause. The rule is simple: three six-foot galvanized ground rods, six to ten feet apart, bonded with a continuous wire, installed in permanently moist soil. Almost nobody actually does this, and almost every weak-fence call turns out to be a grounding problem.
For any energizer over one joule, plan on at least three eight-foot copper-clad or galvanized ground rods. Larger units over six joules may need five rods. Space them at least twice the rod length apart - so six-foot rods spaced twelve feet apart, eight-foot rods spaced sixteen feet apart. Rods too close together act as a single rod with a smaller effective ground surface.
Use galvanized rod with galvanized clamps for a livestock fence. Copper rods paired with steel wire corrode at the junction within a year and lose contact. If you must mix metals, use a bimetallic clamp and coat the connection with dielectric grease.
The best ground bed is in permanently moist soil near a building downspout, in low ground that does not fully dry out, or in a shaded spot under a tree. Avoid dry, sandy, or rocky soil. If your chosen site is dry for part of the year, bury the ground wire connecting the rods in a trench and consider watering the ground bed during droughts. A garden hose left trickling once a week in August can double the performance of a fence on dry ground.
Keep the ground bed at least fifty feet from any other ground system - buildings, water lines, or another electrical service. Stray current from utility grounds can create ground loops that phantom-charge a fence or, worse, back-feed the energizer.
After installation, test the ground system with a fault tester. Short the hot wire to ground fifty yards from the energizer by wrapping several strands of bailing wire between the hot wire and a steel T-post driven into wet soil. Then read voltage on the furthest ground rod from the energizer. A good system reads under 300 volts at the rod. If you read 500 volts or more, your ground is inadequate. Add rods. A fence that cannot move current back to the energizer cannot shock an animal.
No single fence design works for every class of livestock. The animal's height, hair coat, and temperament all change the correct wire spacing, number of wires, and whether any grounded wires are needed.
A permanent cattle fence is typically three or four high-tensile wires with the top wire at 42 to 48 inches, one or two middle wires, and a bottom wire at 18 inches if you want to discourage escape under the fence. Two of the top wires are electrified, the bottom wire can be either electrified or grounded depending on soil conditions. A temporary paddock fence for rotational grazing can be a single polywire at 30 to 36 inches, which is enough for trained cattle.
Sheep and goats are the hardest class of livestock to fence electrically. Wool insulates, and both species will probe a fence with their nose until they find a weak spot. Use five to seven wires on a permanent fence, with spacing tighter near the ground - typically 4, 8, 14, 20, 28, 38 inches from ground up. Every other wire electrified, alternating with grounded wires, creates a hot-ground system that works even in dry conditions. A higher voltage under load is important here - aim for at least 5,000 volts at the wire.
Horses respond fast to electric fence but are prone to injury on high-tensile wire. Use polytape or polyrope rather than bare wire, and keep the top wire at chest height, typically 48 to 60 inches. A single wire is usually sufficient once horses are trained. Avoid barbed wire entirely near any electric system, as a spooked horse running into a combination of barbs and an electrical pulse can result in severe injury.
Pigs are trained fast and stay trained, but only if the fence makes contact with the snout, which is their primary investigation tool. Put the first electrified wire at 6 to 8 inches above ground for piglets and weaners, and at 10 to 12 inches for sows. A second wire at 18 to 24 inches handles the taller stock. Pigs are intelligent and will test a fence that is off - always verify voltage before turning new stock in, because a pig that learns the fence is down once will test every fence afterward.
A fence to keep coyotes, bears, or big cats out of a pasture needs more wires, closer spacing, and higher voltage than a livestock retention fence. Typical predator fences have 7 to 9 wires on 5 to 12 inch spacing, every other wire electrified, with the lowest wire 4 to 6 inches above ground. A bear fence adds a hot wire baited with bacon or peanut butter on a foil strip - one good shock on the tongue is worth months of reinforcement. Always run the energizer for a predator fence at 5,000 volts or higher under load.
Rotational grazing is where solar electric fence earns its keep. The ability to move paddocks every day without running extension cords or hauling batteries transforms how a small pasture can support stock.
Polywire is 1/8 inch twisted plastic with six to nine conducting strands. It is light, cheap, and handles well on a reel. Polybraid is thicker and stronger, with more conductors, making it better for permanent subdivisions and long runs. Polytape is half-inch or wider ribbon, far more visible to horses and stock unfamiliar with electric fence, and also higher wind resistance.
For daily-move cattle paddocks, a lightweight polywire on a geared reel is fast and reliable. Three-to-one gear reels wind up 400 yards in a minute. Buy decent wire - stainless steel conductors over tinned copper, at least nine strands - because cheap polywire breaks a strand every time a cow steps on it, and after one season you are dragging a rope with almost no conductivity.
Fiberglass step-in posts are the standard for portable fence. Look for posts with multiple wire slots so you can run two or three wires without adding clips. The foot should be a full length pedal, not a small spike, so it stays upright in soft ground. Keep a handful of taller posts for crossing ditches and low spots where the wire would otherwise sag onto the ground.
A 12-volt battery in a milk crate with a one-joule energizer and a 10 watt solar panel zip-tied to a T-post is the standard small portable rig. For larger moves, mount the same components on a folding platform or in a wheelbarrow. Always stake a ground rod at the energizer location before turning it on. A portable energizer with no ground rod is a common mistake that results in a fence that reads 8,000 volts on a tester but does not actually shock anything.
A weak fence is almost always a cumulative result of a dozen small installation shortcuts rather than one big mistake.
Every corner and end post needs a horizontal brace. A single post cannot hold tension on 1,000 feet of 12.5 gauge high tensile wire without leaning within a year. A standard brace is two posts set deep in the ground, a horizontal rail between them, and a diagonal tension wire wrapped and twisted tight. For permanent fence use 8-foot posts with 3 feet in the ground minimum, and use wood posts or heavy steel for the corners even if the line posts are T-posts.
An electric gate on an insulated handle is fine for occasional foot traffic. For a vehicle gate, run an underground cable from one side to the other in buried PVC or direct-burial wire rated for underground use. Never run the gate wire overhead with vehicle clearance, because eventually someone will forget to drop the handle and drive through the gate, tearing down the wire and possibly wrapping it around a driveshaft.
High-tensile wire is meant to be under tension - 150 to 250 pounds per wire is typical. Use a spinning jenny to feed the wire, a strainer on every run, and check tension with a spring scale. Overtensioned wire breaks in cold weather. Undertensioned wire sags and touches posts, vegetation, or ground during temperature swings.
Buy good insulators. The cheap black plastic insulators that come with T-posts fail in UV within three years. Use UV-stabilized porcelain or high-density polyethylene insulators on corners and any post where wire is deflected. On straight runs, plastic insulator clips on T-posts are fine if you replace them every five years as part of routine maintenance.
When the fence stops hitting like it used to, work through the diagnostic steps in order. Skipping ahead to the battery or energizer when the problem is actually grounding is the most common wasted afternoon.
Buy a digital electric fence tester - the kind with LED bars or a digital voltage readout. Walk the entire fence line. Note the voltage at the energizer output, at mid-fence, and at the far end. A good fence reads within 1,000 volts from end to end. A drop of 3,000 volts between the energizer and the far end means you have a short or a very long run of vegetation contact in between.
Walk the fence looking for wire touching ground, bent T-posts where insulators have cracked, vegetation contacting the wire, and broken wires. A fence fault locator makes this much faster - it reads current flow direction along the wire, so you can walk along watching the needle and follow the current to the fault. On a 40 acre paddock, a fault locator turns a two-hour walk into a ten-minute job.
If the energizer clicks slowly or stops clicking, test the battery voltage at rest. A 12-volt lead-acid battery at rest should read 12.6 to 12.8 volts when fully charged. Below 12.2 volts under no load, it is significantly discharged. Below 11.5 volts it may be permanently sulfated. Test the panel during a sunny day with the battery disconnected - a 12 volt rated panel should read 18 to 21 volts open circuit. If the panel reads normal but the charge controller is not bringing the battery up, check the controller's wiring and the fuse on the battery side.
Direct lightning strikes are rare but induced surges from nearby strikes are common, and they kill energizers. Install a lightning diverter - basically a spark gap between the fence wire and a separate ground rod - every 500 feet along long runs, and always one at the energizer. A damaged energizer typically still powers on but puts out weak pulses or none at all. Many manufacturers honor a limited lightning warranty if you can show the diverter was in place.
A small solar fence kit for a single paddock runs $200 to $400 complete - one-joule energizer, 10 watt panel, 12 volt 12 amp-hour battery, wire, and posts enough for a half-mile loop. Mid-size rotational grazing setups are usually $800 to $1,500 for a two to five-joule energizer, a 100 watt panel, deep cycle battery, and two to three miles of high-tensile wire with posts. Large ranch installations with six to fifteen-joule energizers, multiple ground beds, and miles of high-tensile fence run $3,000 to $10,000 depending on acreage, brace count, and whether you are paying for install labor.
Compare that to the annual cost of pasture lost to overgrazing, feed hauled because paddocks were too big, or animals escaped onto the road. A properly designed solar fence pays for itself in a season.
The three things that make or break a solar electric fence are the energizer's joule rating under load, the ground bed, and the installation details of corners and tensioning. Get those right, oversize the panel and battery for the worst week of the year, and the fence will quietly hold stock for a decade with nothing but a weekly walk and a battery change every few years. Get them wrong and you will spend every month chasing shorts, charging a dead battery in the shop, and fixing a wire that the cows pushed through last night.
Take the time up front. Size generously, ground thoroughly, and build for the worst conditions rather than the average day. A fence that works in February mud and August drought works everywhere in between.
It depends on fence length and vegetation, not on advertised voltage. A clean paddock under one mile needs only 0.5 to 1 joule, rotational grazing runs of one to five miles want 2 to 4 joules, and a brushy perimeter of 5 to 15 miles needs 4 to 8 joules. Always oversize, buying an energizer rated for at least double the miles you actually fence.
For any energizer over one joule, install at least three eight-foot galvanized ground rods, and five rods for units above six joules. Space them at least twice their length apart, so sixteen feet for eight-foot rods, and bond them with a continuous wire in permanently moist soil. Test it afterward: a good ground reads under 300 volts at the furthest rod.
Voltage under load at the wire decides whether stock respect the fence. Cattle need at least 3,000 volts to feel it through their hair and hide. Horses learn at around 2,000 volts and can injure themselves on higher output. Sheep and goats are hardest because wool insulates, often requiring 4,000 to 5,000 volts and multiple low wires near the ground.
Take the energizer's daily watt-hour draw and divide by three for summer sizing or by 1.5 for reliable deep-winter operation. A six-joule fence using about 240 watt-hours a day needs roughly a 160 watt panel north of 40 degrees latitude, doubled in cloudy coastal regions. Pair it with a battery you never routinely draw below 50 percent.
Join our list for practical guides on farm tech, precision agriculture, and tools that work.